And so little nice weather and daylight to do it in!
As discussed in this post, having to give Juniper eye medication 4 – 6 times a day has made the need for some sort of make-shift barn more urgent, as has Leeloo and Juniper’s sudden desire to actually eat hay.
Up to this point there was enough grass in their track system (I know the official paddock paradise track system book says there should be no grass in your track, but clearly, we are far from the ideal scenario here) that up until recently when I put out hay, they weren’t very interested in it. Granted I wasn’t putting the good hay out and the roughage hay that I was putting out was the questionable stuff that I knew had gotten a little rained on, so their lack of interest was understandable. However, between eating the grass down over the past three weeks and me finally getting into the hay that had not gotten wet, both Leeloo and Juniper are now genuinely excited about eating hay. This has made the need to get more hay before winter a little more important; yes, I can always find some in winter, but I’d rather deal with it now.
I created plans that are loosely based off of the shelters we currently have but also slightly inspired by sturdier overall construction.
We were originally going to create the boards and beams we needed using the white oak cut-offs purchased for my hay boxes by gluing and screwing them together. Last weekend we officially got started and managed to make one of the ten 6”x6”x12’ “foundation beams” we needed to make. Once we added in the cost for glue and screws it turned out to be almost the same price as just purchasing some of the boards and beams. Not the big giant beams, which would cost a small fortune, but we can get buy 2” x 6” x 8’ boards for almost the same price as we could create them out of cut-offs so we decided to just buy the bigger boards to make this process go faster, and use less glue and screws.
The boards arrived late on Thursday so attempting to build this thing will be occupying our time for the next few weeks. The goal is to have it done before our next farrier appointment in two weeks. Please note, we know almost nothing about building and woodworking and if you do those plans above and this list will probably make you mad or sad or both. If you are willing to work for free you can always come over and set us straight, otherwise you’ll just have to watch this train wreck slowly unfold.
(Unrealistic) Goals for the next two weeks:
Create the “foundation beams” and a few longer boards out of the 2”x6”x8’ boards
Build the 4’x8’ “wall cells” we’ll use to build the walls
Set the “foundation beams” out in their proper spot and figure out how to level them (that part is still kind of fuzzy in my mind)
Erect the “wall cells” on the “foundation beams”
Create rafter beams out of lumber (that still needs to be purchased)
Install the rafter beams
Install the purlins (that term I do know is correct!)
Install the roof (materials source is still TBD, I should probably get on that)
Install our temporary siding since long term this will be a bug/summer shelter with only a roof and supports, no actual sides
What are the chances we can pull this off in two weeks and it won’t collapse in on itself the first time we have a stiff breeze?
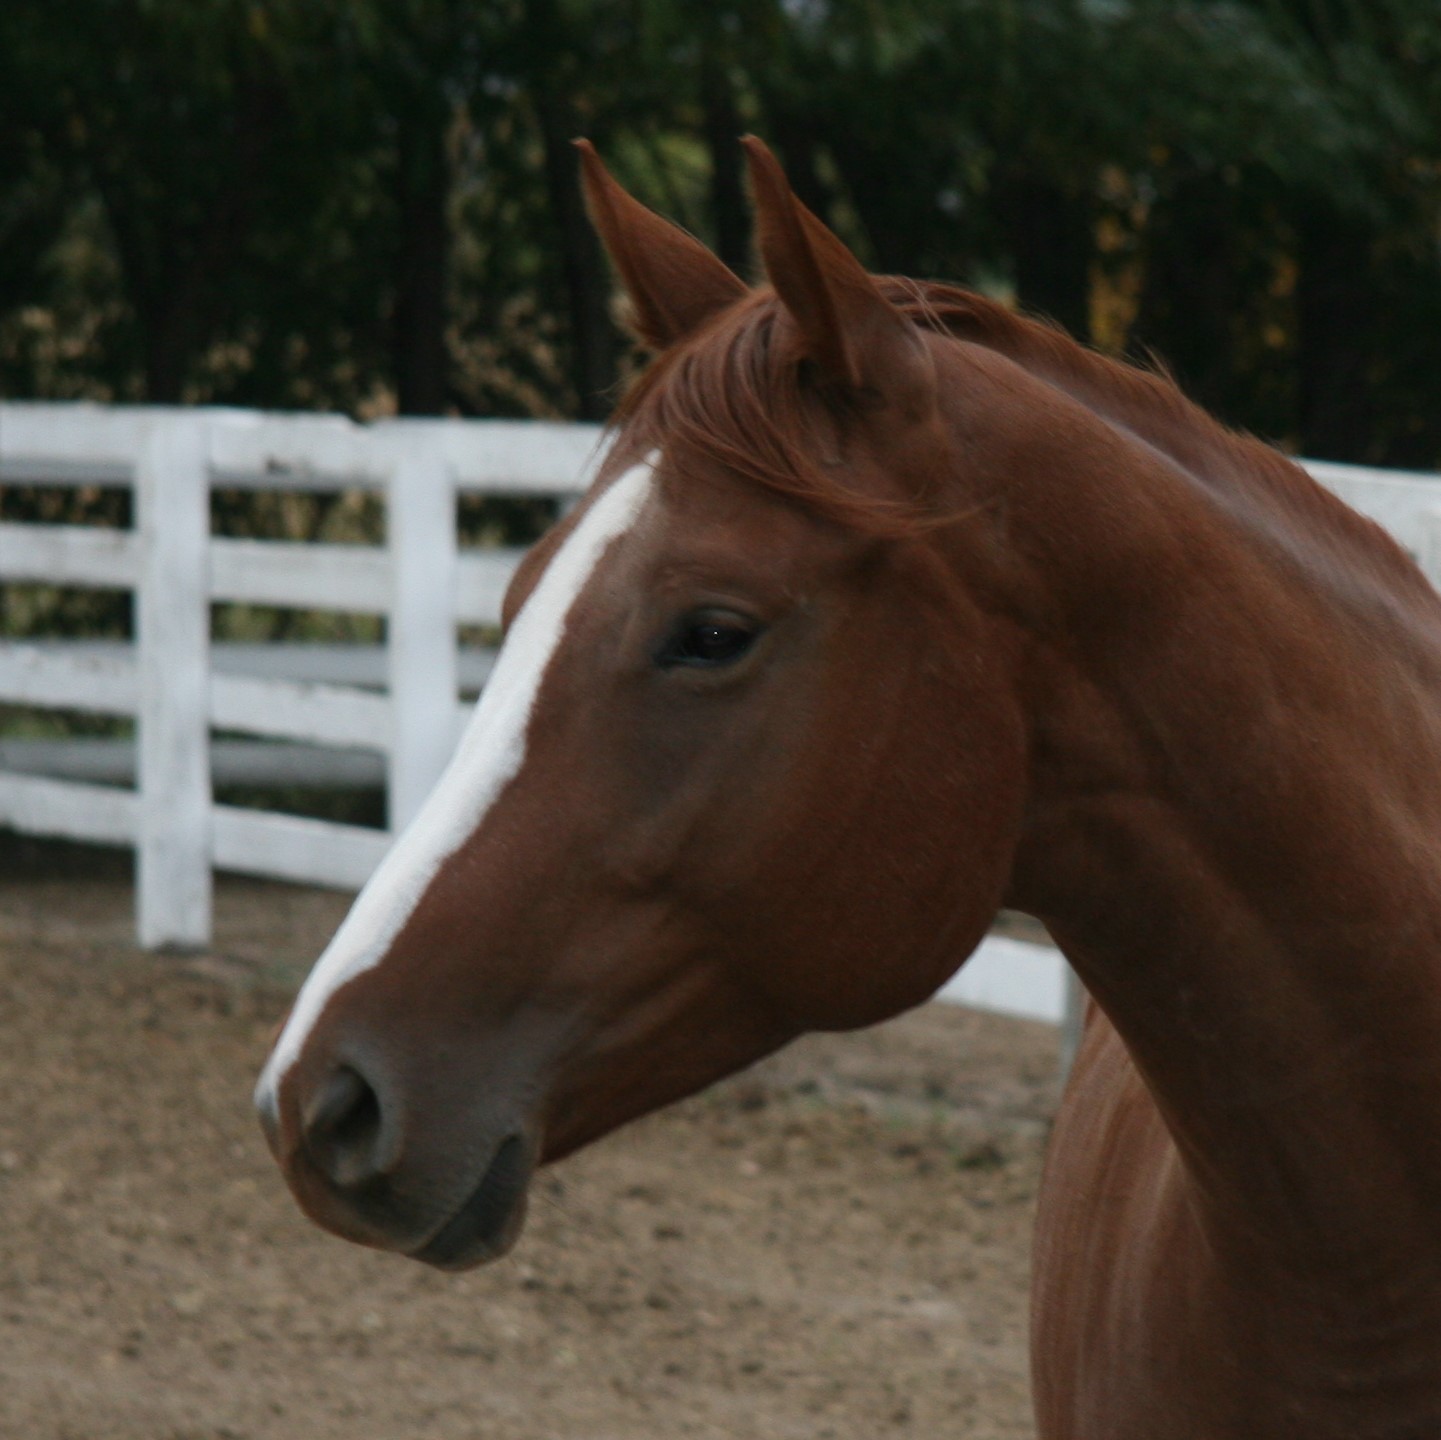
Juniper came to us with an eye injury. Unfortunately it was healing very slowly and developed an abscess over the top of it that is preventing any medication from getting to the actual injury, so the original injury is still not healed and now we also have to heal the abscess itself.
Some of the new drugs for fighting Juniper’s eye abscess arrived late last Tuesday, so Wednesday was day one with the stronger antibiotic for her eye itself and a broad-spectrum oral antifungal. The drugs we had been using were ointments that were pretty easy to apply. They have enough substance to stay on your finger until you position yourself and the horse (or pony) and wipe it along the eyelid, and you didn’t have to be perfect about placement. My vet was able to find the eye antifungal as an ointment (which we are still waiting for), but unfortunately the stronger eye antibiotics could only be found as eyedrops. The old medications were also given only three times a day and the new meds have to be given 4-6 times a day. So far we’ve managed five doses a day. Sort of. It turns out I suck at giving eye drops. I need one hand to hold Juniper, one hand to hold her top eyelid open, another hand to hold her bottom eyelid open, and yet another hand to squeeze the dropper. That is two more hands than I currently possess. Things have gotten a tiny big better, mostly in terms of not having to actually hold Juniper because she stands relatively still on her own. That is due entirely to positive reinforcement training, also known as clicker-training, also known as bribery, but like, intentional, well thought out, bribery.
Small digression – if people are interested, I can write more about this in a future post. A while ago I discovered Mustang Maddy and started down a clicker-training rabbit hole. I got some books and clickers for the holidays and have been working on it off-and-on with Leeloo for about two years. Super simplified summary for those of you not familiar with clicker-training: you teach your horse (or dog or dolphin or elephant or whatever) to associate a certain sound with a reward of some sort (hence “positive reinforcement training”). Then when you ask them to do a thing you use the sound as a way to communicate with them that they did the right thing. This is great because you can get the sound out IMMEDIATELY so they know exactly what the right thing is, whereas the reward might take more time to give them, and meanwhile they can get distracted and forget or not realize why they got a reward at all.
My concern was that Leeloo and I are still beginners at clicker-training and I didn’t know what she would do if she heard her clicker sound and then didn’t get a reward. I also didn’t know how I could use the clicker with one hand during this eyedrop process when the biggest issue is that I need more hands. I decided to make a random noise that I personally have never used with a horse before so Leeloo would never have heard it and hopefully neither had Juniper. There are very important guidelines and rules that should be followed when first introducing clicker-training to a horse and unfortunately Juniper and I didn’t have time or a physical location to do them in so we skipped right over them; this may be an issue long term but for now I’m hoping for the best. I started by making my sound and just giving Juniper a treat the day before we got the meds. Then on our first day with the meds I started by standing next to her and putting my hand by her eye and waiting until she stood still, then I made the sound and gave her a treat. Then I pulled the eyelid apart, waited till she stood still, made the sound, gave her a treat. Then I pulled the eyelid apart, placed the eyedropper near her eye, waited till she stood still, made the sound, gave her a treat. Then we did the actual eye drop. We are doing this every time I attempt the drops and for the first few days I would randomly go back a few steps in the middle and the end so we don’t end our time together with a drop in her eye.
Her standing is getting much better, but somehow I must have a tell for when I’m just holding the eye dropper near her eye versus planning on actually putting a drop in because she stands much better when I’m just holding it than when I plan on putting a drop in. She is also nickering for her treat as soon as she hears her “you did it right” sound, which is great because she is definitely associating the sound with the treat. She’s also associating the blue fanny pack the treats are in with treats and is trying to get them on her own (being polite about treats is one of those foundational steps we kind of skipped…).
The issue remains that I personally suck at giving eyedrops. Even with Juniper standing pretty quietly, I can’t seem to squeeze the eyedrop tube and keep it still enough to actually drop the liquid where I want it to drop. When I squeeze the tube, it moves, and the drop goes on my finger or down her face instead of in her eye. I am not the only person to suck at giving eyedrops, so the vet also sent some very tiny syringes with the idea being I could get some of the drops in the syringe and kind of spray it at her eye. We tried that on day three and somehow I suck even worse with that method than with the actual eye dropper so we’re going to stick with the eye dropper for a few more days and see if I can get any better.
The oral antifungal medication is going a little better at least. Day one we had to give a loading dose of 19 pills which I mixed in her food, added half a chopped-up apple to, and fed her, hoping she’d fall for it. She did not. She took a bite, spit it out, tried a second bite, spit that out, and then wandered away to eat grass. I went inside for molasses and added some, then added a little more, then added a little more. Sugar is as bad for horses as it is for people, and because Juniper most likely has Equine Cushing’s disease (more accurately called pituitary pars intermedia dysfunction or PPID) she may have some insulin issues, which is why sugar is extra not good for her. However, if I tried and failed too many times to get her to eat her meds she would just stop trying and then I would be out 19 very expensive pills. Luckily the overload of molasses was enough, and she ate it all up on the second try. She only needs seven pills a day for the rest of the time (three weeks for this med) and I was hoping the apple alone would be enough; it was not. I didn’t have to use as much molasses the second day, but still more than I liked. I started measuring it on day three instead of just pouring it out until it looks like enough. Having tried several times, I have it down to just a half tablespoon of molasses. The best variation so far is to let the pills soften up first (Juniper’s food is soaked so there is enough water in there to soften up the pills), but keep them spaced apart from each other, then put a little molasses directly on each of the softened up pills, then mush them around with everything else.
Complicating everything is that Leeloo thinks that when I’m in their space, I’m there for her, and nobody else. To be fair, that has been true for the last 13 years. She’s not mean to Juniper, but when I go up to Juniper, Leeloo comes up to me and Juniper moves away a few steps. I then step closer to Juniper, Leeloo then steps closer to me, and then Juniper moves away a few steps. The result is a ridiculous slow-motion chase around the shelter area which is where they are usually hanging out during the day.
I don’t have a barn (yet) and I still haven’t gotten my hay shelter built so my make-shift barn isn’t actually useable as such, being currently full of hay. This means the only place where I can actually separate the two of them is the round pen. That would be okay, except (A) there is no shelter so if it’s raining that means I’m attempting to put in eyedrops in the rain (B) there is ton of grass in there so Juniper is pretty distracted by all the food and (C) it is SUPER extra buggy in the front of our house where the round pen is. I have no idea why, but every single kind of bug is worse up there. The mosquitoes, the flies, and those stupid f*ing midges or gnats. I am coming to hate them more than any other bug (other than ticks which will always remain enemy number one) because they love to divebomb my face, and actively fly into my nose, my ears, my eyes, and my mouth. I have had at least three fly into my mouth while I was trying to blow them out of my eyes. They drive all of us crazy! As if trying to give eyedrops to a pony wasn’t hard enough trying to do it while you are both being swarmed by gnats is miserable. This, along with the rapidly shortening days, is why I feel very strongly that I need a barn. Nate keeps reminding me that I don’t actually *need* a barn, I *want* a barn, but after the last few days of giving eye meds it feels like a need to me!
Video proof that the bugs are awful!
Leeloo and Juniper feel the same way I do about the bugs and would also like a barn. Now we just need one of us to win the lottery!
Things have been a bit crazy around here and the current post needs more work so there will be a slight delay in posting. In the meantime please enjoy this video of the bumble bees loving the heck out of this plant we received as a gift from some friends when we first moved it. I have no idea what kind of plant it is, but it is a perennial, the bumble bees love it, and it has survived the stupid f*ing deer for three years now despite their best efforts to kill it each winter.
We’ve had Juniper and Leeloo home for a little over two weeks now and it’s been, okay. So far most of my time has been taken up with poop. I am still obsessively cleaning out almost all poop from the whole track almost every day. This will not last. If nothing else the freezing temperatures will eventually force a stop. But I am trying to stay ahead of the parasites so we’re doing both Ivermectin Gold and Strongid but I am waiting a few weeks in-between them and while we wait I will stay obsessive about picking up poop.
For those of you not familiar horses eat off the ground so they can pick up parasites. There are various treatments for them, but the industry has not been able to create/find a new one in decades and the parasites are starting to show resistance to the medications that we do have, so the shift has been to minimizing parasite load in the first place through improved management. Which mostly boils down to: pick up the poop. Long term I am planning on getting a harrow I can drag behind my lawn mower and I’ll use that for the poop in the majority of the track and just pick up the stuff around their main hangout areas like the shelters, water, and hay boxes.
Speaking of hay boxes – I finally finished the lid!! AND! We built a second one (that still needs a lid). Big thank you to my friend for helping me figure out a design for the frame of the lid. Still need to figure out a mechanism for keeping it on the box, but right now Juniper has a grazing muzzle on and we’re still feeding the “roughage” hay so there isn’t danger of overeating so I’m keeping the nets off. This however has made me realize that a hinged lid might not be the best option and something that comes all the way on or off, but the horses can’t get off, will probably work better. Still haven’t worked that out yet.
What I did not realize was that Leeloo and Juniper would be afraid of the hay boxes. Leeloo in particular truly confuses me about what she does and does not find scary.
Example – several years ago at our previous barn they were doing construction and after the work day would sometimes store equipment in the arena. I was out with Leeloo and since we were alone I let her loose to roll (rolling in relatively clean sand is always preferred to rolling in mud). I turn my back for three seconds to set down her lead rope only to find that she has decided the skid steer with the two giant skids sticking out the front looks like the best toy ever. She has walked right up to it, between the two skids, and is in the act of reaching in to pull on the levers. Leeloo has tried to put almost everything she has ever come across in her mouth: the vet’s clipboard, the chiropractor’s iPad, sweatshirt strings, every whip ever, pitchfork handles, broom handles, literally any handle, glasses, Nate’s beard, cat food, hoses, the list goes on forever. Anyway, here is my horse, standing between the skids of the skid steer, reaching in to pull on the handles that make it go. Great. I managed to get around her so I’m facing her and signal her to back up and luckily she does. She clears both skids before she notices the next thing the work crew left behind. The single most terrifying thing in the world. A large wooden spool. About three feet across and about a foot and a half high. Probably used for a large hose or tubing, but currently empty and just sitting there. Leeloo comes to a dead stop, flags her tail, arches her neck, and goes into her snorting impression of an Arabian horse. The thing that could actually cause her harm – great toy. The thing that could cause her no harm in any conceivable way – terrifying monster. I do not understand my horse.
The haybox apparently counted as a terrifying monster. Not having expected that, I hadn’t made any effort to introduce her to it. Nate and I just put it out in the field while Leeloo and Juniper had been hiding from the bugs in the shelter and they hadn’t noticed. Now Leeloo had come up for water by herself and must have spotted it. I missed her very first reaction but I caught it out of the corner of my eye. When your normally pretty mellow horse decides to prance around snorting with her tail flagged and her neck all arched you notice. By the time I found my phone she had managed to calm herself down a lot and worked up the courage to investigate closer. You’ll notice she chickened out on her first attempt to walk by it calmly and ended up running past it, but then when it didn’t chase her she came back around for another try and this time did actually get to it and take a few bites of hay before deciding she had had enough of bravery for the time being.
The other thing that has been taking up most of our horse related time is Juniper’s eye infection. We knew she had one when we got her, but it just wasn’t getting better so I had the vet out the Monday after we brought her home and then we had a recheck last week. The conclusion is that she has formed an abscess over the top of the original injury and eye abscesses are usually fungal or mixed infections so we need to change up our treatment plan. Here is what I got from the vet:
Diagnosis: Corneal stromal abscess.
Treatment: Since the literature and the ophthalmologist describe these as being commonly fungal or mixed infections, the approach would be to treat for fungus and bacteria, while trying to get the eye comfortable and stop the reflex uvieitis. The recommended treatment duration is 6-8 weeks.
6-8 weeks of giving eye meds 4-6 times a day – fun times.
I will admit that when I was imagining what it would be like to have my horse at home I hadn’t been thinking of poop and medicating eyes. But I know long term the good will outweigh the not so good. Even now, with most of the time spent doing the less than fun chores, it is really nice having them home. When Juniper nickers at me for her breakfast, or Leeloo comes up to see what I’m doing – which is usually picking up poop at which point Leeloo will sniff the poop and then immediately poop right by the poop cart (thanks), or when Leeloo calls to me when I am in the garage working and trying to have a conversation with someone else (seriously Leeloo, not everything is about you) they are a lot of fun to have around.
Juniper would like Leeloo to get more friends. Having Leeloo’s full and undivided attention is getting to be a bit much for her.
Because it is just the two of them and Leeloo is used to being with a herd at all times Leeloo insists that the two of them be together at all times, not just within sight, but together. Leeloo also hates bugs almost as much as I do which means she wants to be hiding in the slightly less buggy shelter area most of the daylight hours. Juniper on the other hand doesn’t mind the bugs if she can be shoving food in her face and would rather be out eating all day. But because Leeloo is who she is, and has no one else but Juniper, that means that Juniper has to be where Leeloo wants to be, and that is in the shelters and not eating for much of the day. They are not starving by any means, I have been picking up enough poop every day to know that, but Juniper would definitely be eating more if she had a chance. For Juniper’s sanity we really need to find Leeloo more friends.
Juniper’s preference – grazing
Leeloo’s preference – hiding from the bugs in the shelter
I have some strong feelings on who this next friend needs to be. I have wanted to have a horse farm my entire life, specifically I have wanted to work with foals and young horses. I had my first opportunity when Leeloo was born and have loved almost all of it; the injuries, illnesses, and mystery lameness not so much, though I have learned a ton. My goal when we moved here was to start a very, very, small horse breeding and training operation. I had hoped to have a new foal every other year and work with them slowly over several years and then sell one sane, sound, well trained, six- or seven-year-old every other year. VERY small operation. But to do that I need a mare worth breeding. I love Leeloo, she is one of the best horses ever, and I would love to have many of her qualities in future horses. However, the sheer quantity of lameness issues she has dealt with, some with clear sources and some without, combined with some of the soundness issues her sisters have had, makes me unwilling to breed her. I never, ever, want to have to go through the pain, heartache, and money that I have gone through with Leeloo again and the chance that there might be a genetic component to her various lameness issues is just too high to risk passing on to another generation. Therefore, I need to find a mare worth breeding.
I have learned that means different things to different people, this is what I mean when I say that: I’m looking for a mare with good conformation and a good personality.
Conformation. There is a lot of information on what good conformation looks like – this post by the U of M extension has a really nice summary. I’m looking for everything they mention plus I want a pretty head and good feet. A “pretty head” is a little harder to pin down than good confirmation, but I did find this website that articulates it fairly well. I think Leeloo has a pretty head, but of course I am biased. Good feet can be a bit trickier to identify because the condition of a horse’s hoof is a combination of conformation, genetics, nutrition, environment, and farrier care. Bad farrier care, bad environment, or bad nutrition can ruin perfectly good feet. That being said after having a horse that had to be shod year-round and dealing with Leeloo’s various feet issues, having good feet is a must. I read an article in the American Quarter Horse Journal (it was an actual physical magazine so I can’t link it) about one of the founding studs of the Quarter Horse breed. He was a really talented racehorse and a popular stud, but they mentioned in passing that he had bad feet. My immediate thought was, and you just bred that trait into how many future generations? So, I’m looking for good confirmation, good feet, and a pretty head.
Personality. I think a foal picks up much of their early personality and behavior from their dam. Leeloo’s dam Annie was a sweet, friendly, smart, willing mare who loved to be around people (she was a lapdog that somehow got born into a horse body) and I believe Leeloo got that from her both through her genetics and through learned behavior; by watching how Annie interacted with the world and people around her. That’s not to say you can’t ruin a perfectly good-natured horse by treating it poorly or that a horse that starts out as a bull-headed a** can’t eventually become a friendly and willing partner. But starting out with a foal who already likes and trusts people because their mom likes and trusts people makes the job easier. So, I’m looking for a sweet, smart, and willing mare.
Things I don’t care as much about.
Height – I am a tall person and most of my height is in my torso, so when I’m sitting on a horse I look even taller. If I ever start showing again it’s important that the horse and I “make a pretty picture” and since I’m 90% torso I look stupid on short horses. Not to say shorter horses aren’t great, we just look very disproportionate. So, I’d like a horse that is at least 15’1 hands high and not taller than 17 hands. I know that in some performance-based events (like barrel racing) shorter horses are preferred which is why my height range has expanded from my long-term preference of 16 hands or so.
Color – I have always been partial to buckskins, duns, bays, and roans. But in the end color doesn’t matter, good confirmation and personality matter. Also, Leeloo is a chestnut and Annie was a gray and I love/loved them completely so who cares about color?
Breeding – I think too many people get caught up with certain bloodlines and in the end a good horse is a good horse. A horse can have the “best” (as in most expensive or most famous) breeding and be just a so-so or worse horse. I do however want a registered mare because I think long-term it gives more options for what to do with her and how I can market and sell future offspring.
I have just recently started searching for this dream mare, having been preoccupied with the seemingly never-ending fence saga, I’ve gotten a few leads but so far they haven’t panned out, or have been out of my price range. I had always assumed I would be getting a Quarter Horse or an Appendix since those are the horses I have had so far in my life and most of the people I showed with while growing up had Quarter Horses or Appendixes. However, two of my last three leads were Paints and one of the neighbors who I’ve started to get to know better shows her horse at Paint shows. Is the universe telling me to get a Paint?
Leeloo and Juniper officially moved-in to our new track system last Friday. It was not an easy transition for anyone. Okay mostly for Leeloo and I, Juniper settled in pretty quickly.
Leeloo’s former barn is within sight of our current house as mentioned in this post and I was, and still am, concerned that being so close may encourage something drastic on Leeloo’s part, like attempting (and failing) to jump or fight through the fence to go “home.” I was also concerned about the invariable herd dominance interactions that always happen whenever horses are introduced to one another. I have had some good experiences in the past with taking two horses that didn’t get along on a trailer ride together. The shared trauma of the trailer ride didn’t necessarily make them best friends, but they seemed to get along better afterwards. With those two things in mind, I decided to haul Leeloo with us to get Juniper so that she would feel like she had traveled some distance and would have a chance to spend time in the trailer with Juniper.
I talked out my introduction plans with Marin, the barn manager of Leeloo’s most recent barn since she knows Leeloo better than I do in terms of how she interacts with other horses. In addition to the trailering together idea I had also intended to put one of them in the round pen and leave the other on the outside so they could meet over the fence. Marin suggested putting them both in the round pen together so they had to interact and get used to each other but without corners so no one could get trapped. Also being able to observe their new home from a contained space could help them feel more secure as would putting something up to act as a wall of sorts for part of the round pen because there is no shelter of any kind in that area. I was skeptical because Leeloo is taller than the panels are, but we have a large piece of roofing rubber that we aren’t doing anything with that would work well as a “wall” and it couldn’t hurt – so we hung it up.
My friend Hilary was kind enough to trailer us and we met early Friday morning to get Leeloo loaded into the trailer. Leeloo loaded fine as always, but she doesn’t like staying in the trailer; when I leave, she wants to leave with me. Hilary kept her distracted from the other side of the window as I tied her and got the divider shut. Then we headed out to pick up Juniper. Leeloo was unhappy and pawing the entire trip and continued in a state of distress the whole time we were picking up Juniper. I hoped having Juniper in the trailer would make her feel better, but she didn’t seem to notice.
Once we got to our house and unloaded I led Leeloo, Hilary led Juniper, and we walked all around the track. Then we put them both in the round pen together. We left Leeloo’s halter on in case we needed to get her out quickly and left Juniper’s grazing muzzle off so she would have all her resources to defend herself if needed, and to remove any additional stressor. The result was that Juniper immediately started gorging on the grass in the middle while Leeloo ran around the edge freaking out. Leeloo would occasionally roll, which was apparently a good sign because rolling, shaking out, and snorting, helps horses release stress hormones; so she was trying to calm herself down, it just wasn’t working. She would run around the edge of the round pen and then go in and herd Juniper around, making her run and switch directions. It was almost identical to what you see trainers do when they first work with a new horse in a round pen. I was too busy watching and stressing out myself to film it; but it was truly fascinating to watch. Eventually Leeloo stopped herding Juniper and let her eat while she paced for a while longer before finally giving up and huddling by that “wall” we had created on one side of the round pen.
After some time of calmness (on Leeloo’s part, Juniper was still busy eating) we decided to take them on another tour of the entire track system and then let them loose in it. I had assumed, since they seemed to have worked out all their issues in the round pen, that there wouldn’t be any more dominance interactions so I put Juniper’s grazing muzzle back on and let them go. However as soon as they were both loose Leeloo would chase after Juniper and Juniper would defended herself, though she always gave way. Eventually Leeloo managed to herd Juniper down to the shelter area and Juniper stood outside the shelter while Leeloo stood in one of the bays with her head in the corner. That is where Leeloo spent the rest of the day. At one point Juniper was over it and headed back up to the round pen area to eat and Leeloo chased after her and tried to herd her back to the shelter but Juniper held her ground and wouldn’t go back, at which point Leeloo gave up and she spent the rest of the daylight hours moping in the shelter while Juniper ate around the round pen.
Saturday morning I went to do chores (I have to do chores every day now – why did I think this was a good idea?!). They were both separated but calling at each other. Leeloo however was shaking and still seemed very distressed and did not want to leave the shelter area. I walked over to where Juniper was and got her shut into the round pen so I could feed her breakfast. Juniper eats her breakfast very slowly because she gets to have her grazing muzzle off for that and the grass is far more tempting than her breakfast is. Once I had Juniper eating I went over to the shelter area to pick up poop and this time when I walked over to the round pen area Leeloo followed me, and proceeded to pace around the outside of the round pen. Once Juniper was finally done eating I put her grazing muzzle back on and opened the round pen gate. Juniper trotted out and then she and Leeloo acted like they hadn’t spent the whole day together yesterday, with squealing and kicking and being foolish, though no one was hurt. They quit sooner than they had the day before at least and then Leeloo went to pacing in and around the round pen. Eventually she stopped pacing and stayed in the round pen and hid behind the “wall” and just stared at Juniper, who ignored her. Leeloo creeped on Juniper like that for several hours.
Eventually Leeloo left the security of the round pen but she still stuck close to the “wall” just on the other side. Thank you, Marin, for that suggestion!! That “wall” was Leeloo’s refuge for the whole day. As the sun was setting Leeloo herded Juniper over to the shelter area and this time Juniper cooperated and went with her and they both hung out in the shelter, though in respective bays.
In the end I think the move-in plan worked as well as could be hoped. Up to this point Leeloo has always lived with at least other ten horses in, or immediately adjacent to, her paddock so I knew going to just one pony would be a huge change but I hadn’t realized how stressful it would be on her. Leeloo has moved a lot in her past. By the time she was six years old she had lived at seven different boarding facilities and we were moving to her eighth. However, she has been at this last barn for seven years. She had gone from moving, on average, every nine months to staying in one place for seven years.
In many ways I think Leeloo’s experience with this move echoes my own experience when we moved in 2019. All through college and grad school I moved almost every year and it was never a big deal, but then in 2006 we moved into our previous home and stayed there for 13 years. When we moved again in 2019 it was a much bigger shock for me; it was far more disruptive and caused significantly more emotional distress for me than any of the previous moves had. I think Leeloo felt the same about this move.
In addition to going from moving constantly to staying in one place for seven years, Leeloo had also grown up, and in the process became the single most dominant horse of a herd of close to thirty. Going from the unquestioned boss of thirty horses to the boss of one indifferent pony was a huge shock.
Luckily by Sunday morning Leeloo had calmed down enough to actually lay down for a few minutes. She didn’t stay down long, she was clearly trying to get comfortable and just couldn’t, but the fact that she was willing to try at all made me feel better. Then she and Juniper spent the day standing near each other but not engaging with each other. They looked like a couple who had been arguing about something stupid and were giving each other the silent treatment. But at least Leeloo wasn’t shaking or pacing anymore so I’m calling it a win.
I headed to LeVahn Brothers with a sample of what I was dealing with (hookup wire and irrigation tubing) and explained what happened (broken string, broken rope, stuck wires) and came home with some wire pulling lube and a better rope.
We were also back to a weekend so Nate could help. It went much faster with two people, one person operating the shop-vac on one end and the other handling the string on the other. We got the string through quickly and tied it to our new rope and got that all the way through. Then we tied the rope to the hookup wire, once again using the staggered approach, rope to ground hookup wire, then further down added the hot hookup wire. Then we lubed up the wire and Nate started pulling on one end while I pushed on the other. Slowly, but steadily, we made progress; though there was definitely a point where it became far more difficult, and it was about the same point where the rope had broken. We actually dug up the trench there to see if something had kinked the tube but from the outside it seemed find so we kept at it. Nate keeps pulling and I keep pushing. Then the rope breaks free from the hook-up wire. **** **** **** **** (This whole putting up a fence saga sure was stretching my vocabulary.)
Try, try, try, try again. Pull the string through, pull the rope through, attach that rope to that hookup wire like someone’s life depends on it; tape is cheap, use the whole roll! Nate pulls, I push, and slowly, so slowly, through it goes. We have the wire through the tube!
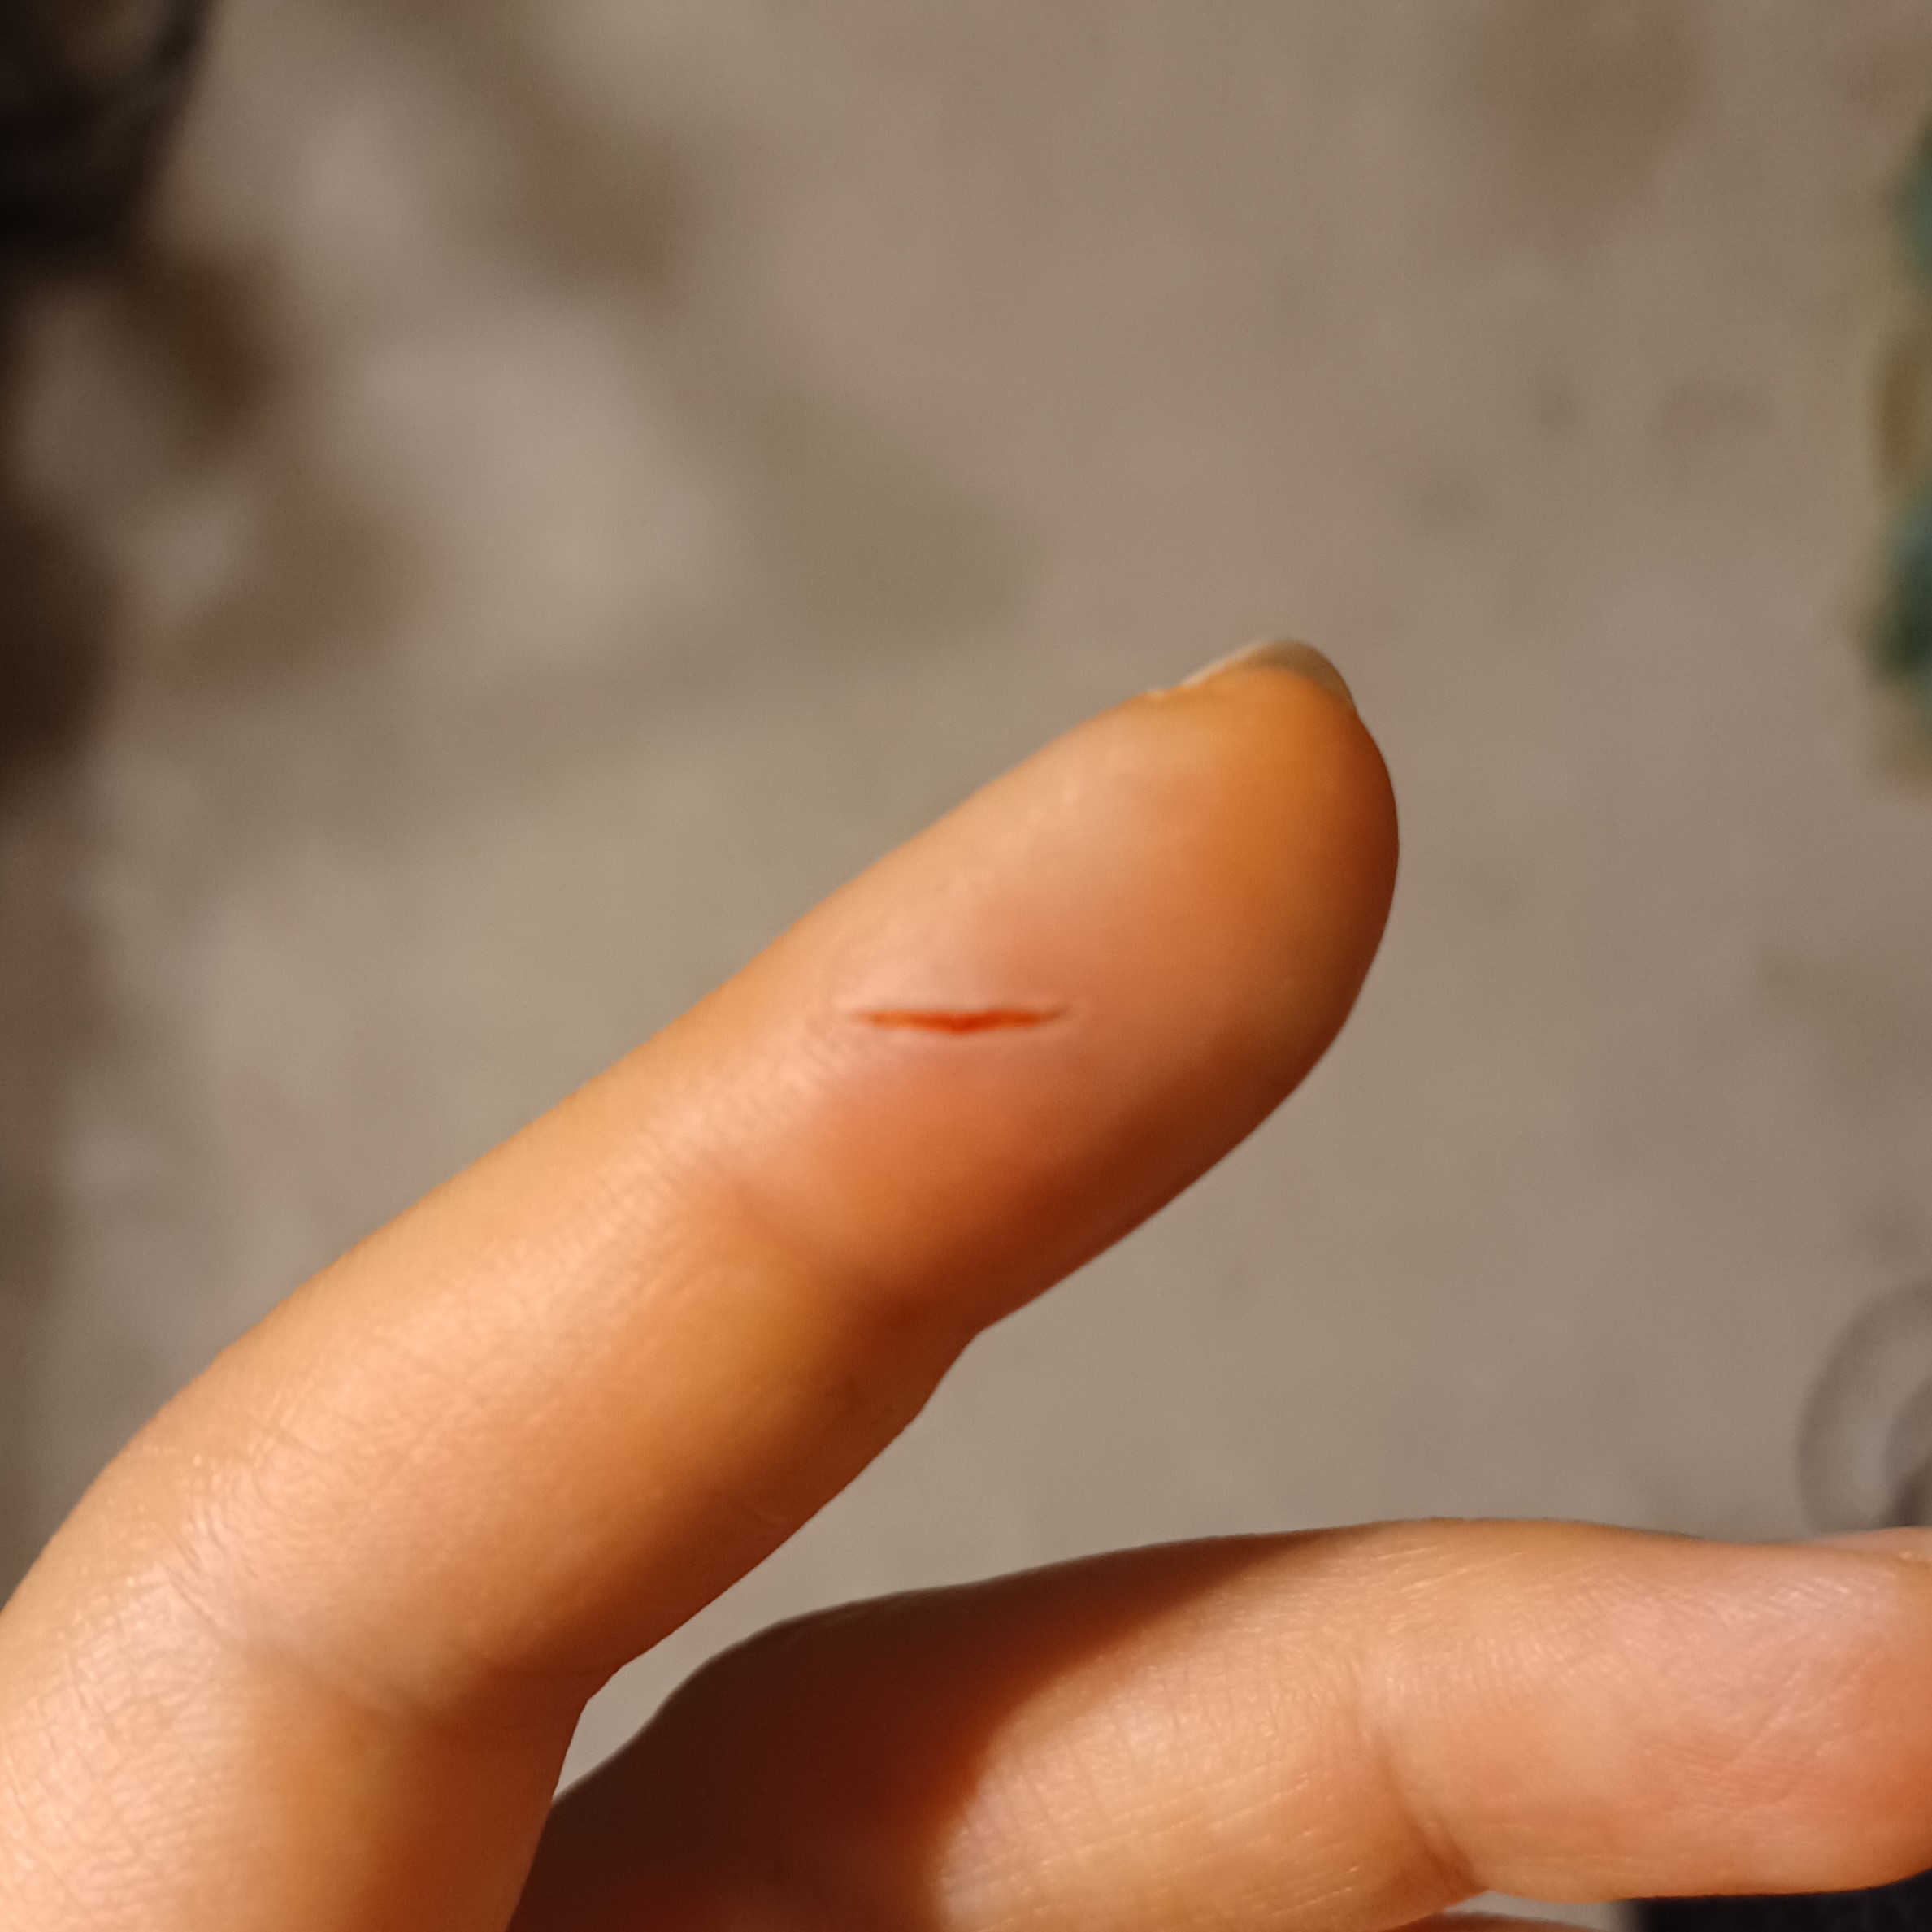
Now we need to connect the ground hookup wire to the ground rods and the hot hookup wire to the fence itself. I was smart enough to spray paint one roll of hookup wire blue so that we would know which was the ground line and which was the hot line. The next tricky part was getting one continuous line of hookup wire to connect all three ground rods to the energizer. The directions were very clear; it could not be three separate pieces of hookup wire, it had to be one continuous run of hookup wire. That meant we had to strip the insulation off the middle of the wire. That is not easy to do, and of course the video did not show that part; the wire was already conveniently stripped. Wire strippers are designed to cut the insulation and then you just pull it off the end, but when you are in the middle of the wire you can’t pull it off, you need to basically filet it off; very carefully, without hurting the wire, or yourself. We failed on both counts. The first effort was Nate’s. He did manage to get the insulation off, but not without damaging the wire, and in the end it snapped. **** That meant pulling more hookup wire through, though that turned out to be fine since we needed enough hookup wire to do all three of the hot lines of the fence anyway. The second effort was mine. Almost immediately I managed to stab myself in the finger, right through my work glove (picture if you like pictures of injuries). Luckily it was bleeding a lot so I was pretty sure the risk of infection was low; and somehow, despite having a white shirt on, I only got blood on my pants, the cardboard I was working on, the driveway, and the garage floor – my white shirt is still white! Nate had been using the string trimmer at the time with ear protection on so I hadn’t even tried to get his attention knowing he would be done fairly soon. As he’s opening the door to the mudroom he is asking “How did you spill red paint by your shoes?” Then he sees me with my hand in the air (trying to keep it above my heart to stop the bleeding long enough to wash it) and is like “Oooooohhhhhh, that’s not paint.”
We took a brief break but opted not to seek medical attention and went back out to finish this ****ing fence. I was far more careful this time and managed to get the insulation off without injuring myself or the interior wire! With that we attached the ground hookup wire to the ground rods and attached the hot hookup wire directly to the top line of ElectroBraid. Then we used a short piece of hookup wire to connect the top line of fence to the second from the bottom line of fence, and then another short piece to connect the second from the bottom line to the bottom line. Then another piece of hookup wire to attach the second from the top line of ElectroBraid to the closest ground rod (we opted for a hot/ground system because that was recommended in places where the ground freezes or when there are drought concerns.) Then we had to dig a trench under the fence to lay hookup wire below it to get electricity from one side of the gate to the other (I let Nate dig that trench, 115 feet of trench digging was enough for me – plus you know, the stab wound). One option for that is to just do a single piece of hookup wire that connects all three hot lines on one side to all three hot lines on the other, and then do a second hookup wire to connect the ground line on one side to the ground line on the other; however according to the internet (which is never wrong) the possible issue with that is if something goes wrong with one line of the fence it can affect all of them, whereas if you connect top to top, middle to middle, etc. and something goes wrong with one line, or you need to disconnect one of the lines for some reason, it won’t impact the other lines of fence. We decided to go with the top to top, middle to middle, etc. option. By this point I was an expert at getting wires through tubes and it was only a 12-foot tube to get under the gate and up on each side, so I managed that on my own all in one day!
Once everything was wired on the fence side, we had to get the hookup wires attached to the energizer which was in the garage. This involved drilling two small holes in the side of our garage which neither of us felt super comfortable doing, but we did it. Hopefully we didn’t mess anything up too badly; we used a LOT of silicone sealer.
We used a lot of silicone sealer, we are both paranoid about putting a hole in our wall. The bricks are holding up the end of the irrigation tubing which is folded over to prevent water from running down it. That also didn’t go as well as the directions implied.
We still need to patch up the drywall on the inside but that is low on my priority list. Wondering why there is so much masking tape? That’s because we don’t know what we’re doing and it took a few tries to get the hookup wire through the wall.
We attached the hot hookup wire to the hot terminal and the ground hookup wire (thank goodness for the blue paint) to the ground terminal and plugged the energizer in. We officially have an electric fence!
I went around with the voltage tester and it seems like we have a decent charge all along the fence. There was some concern because of how far the various parts of the fence are from one another and the house is in between them, but according to the voltage tester everything seems to be working. Also, according to my hand, which got shocked when I went to fasten the gate. We really need better gate closures.
The idea of working with electricity made both Nate and I pretty nervous so we watched and re-watched the videos from ElectroBraid about how to hook up the fence and I did a lot of internet searching. The two things everyone agreed on were that the energizer or fencer needs to be protected from the elements but not too far away from your fence, and a good grounding system is critical to the operation of your fence. Those were the only things they agreed on. Here is a brief summary of some of the other advice:
You need to use copper ground rods – no, you need to use galvanized steel ground rods.
You need one ground rod – no, you need two – no, you need at least three.
You can’t put your grounding system within 50 feet of any underground water, electrical lines, telephone lines, buildings, or other grounding systems – no, it has to be 30 feet away from all those things – no, it has to be 75 feet away from all those things – no, it’s just electrical grounding systems and telephone lines you have to worry about – no, it’s just water – no, it’s just water running to your house – no, it’s just buildings with foundations – oh, and the ground rods should be in a low wet shady spot. Also your ground rods shouldn’t be more than 50 feet from the energizer.
What?!
Bluebird Fencing had already supplied us with three grounding rods and hookup wire so that part was decided for us. What we had to do was figure out where to put the ground rods.
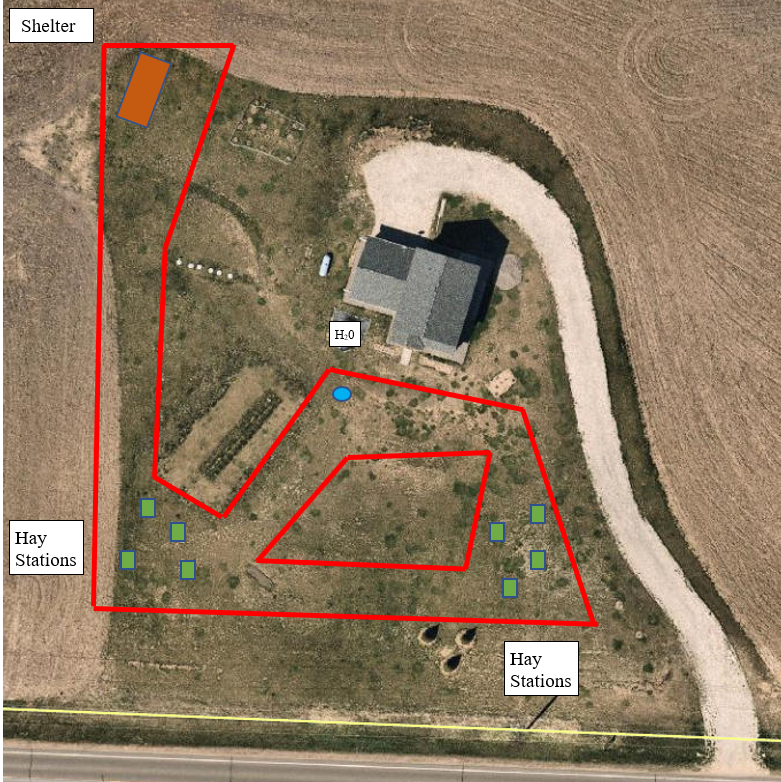
We don’t have a barn (yet) so our only power source is the house and we did not design the house with the thought of having to run power to a fence. Our well is located on the north side of the house; the septic system, drain tile around the foundation, and propane come in/out on the west side of the house; the buried electrical lines come in from the south, wrap around the east side of the house and actually connect on the north side (that way the big ugly electrical box wasn’t on the front of our house). That means there is no place anywhere close to our house where we could put this grounding system. After a great deal of thought, and consultation with several people, we decided to put the three ground rods behind the first “barn” shelter – which is currently hay and wood storage. There is a little triangle of space there that isn’t fenced in and is shaded by the shelter for half the day and out of the way of any foot traffic.
The problem is this spot is 95 feet from the house. I did another round of thinking and looking and there really isn’t any other place we can put this grounding system so that means running hookup wire 95 feet in addition to the 10 feet between the ground rods themselves. That is one hundred and fifteen feet of wire to run, all of which needs to be buried, that means one hundred and fifteen feet of trench digging – fun!
We looked into renting a trencher, but you need a trailer to get it and we have no vehicle capable of hauling a trailer. I did briefly look into getting a hitch for my car, but after finding one and talking to our mechanic we decided not to. At that point I decided I had wasted enough time and had I just started digging that the trench it would have been done by now – so time to get digging!
It sucked! I would not recommend digging 115 feet of trench by hand if you can help it, but it’s not a complicated job so I couldn’t make mistakes and I didn’t hurt myself so that’s a thing.
While taking digging breaks I was also trying to find “polyethylene tubing” which is what our fencing directions said to use to run the hookup wire through when burying it underground, but no one could really tell me what that was. In the end we got irrigation tubing that would be wide enough to fit four lines of hookup wire, which is what we would need to go under the gates; the idea being that the extra width would make it easier to run the two lines (hot and ground) from the garage where the energizer would be to the fence and the ground rods behind the “barn” shelter. We were a little concerned about being able to get 95 feet of hookup wire through a small tube. It was suggested that we first run a string through the tube then tie the string to the hookup wire to help pull it through. The original suggestion was to use a shop-vac to pull the string through but I didn’t think that would manage over 95 feet so I tied a nut to the string and hoped gravity would help. It didn’t. I did eventually get the nut and string through, but it was a ridiculous endeavor. I would feed string through the end of the tube by the house and then shake the tube and slowly work my way down shaking it until I heard the nut rattle. Then I would use a magnet to try to pull the nut along a bit, but it would invariably get stuck, and I’d have to go back up to the top and feed more string in and shake it down. Part of the problem was that the tubing had spent its life up to that point coiled tightly and having to lay flat was not something it was interested in doing, so though gravity was helping us go down the hill it was hurting us on those coils. I did eventually get the nut and string all the way through, but it took the whole afternoon. Then I decided to bury the tube in my trench before getting the hookup wire through it. Was this a good idea? I don’t know. I was concerned about guessing the amount of tubing I actually needed since I could not get it to lay even remotely straight, and I didn’t want to cut through the tubing after the wires were in it. Even now, after having finished everything, I’m still not sure if burying the tube before getting the wires through was a good idea or not.
At this point we have the string through the tube and we have the tube buried in the ground. The next day I tied the string to the ground and hot hookup wires and started feeding them through. I would get so far and then they would stop going in and I would have to go down to the other end (95 feet away) pull on the string some, then the string would get stuck and I’d have to go back up to the top and push the wires in some more; back and forth, push and pull, back and forth. Then the string broke. **** (I will let you guess which expletive I said.)
From the amount of string I had pulled out I guessed I had made it a little less than half way. Try again. I pulled out the wires and untied them from the string and decided to use the shop-vac as recommended since the tube was buried and there was no other way I was getting a string through it. It worked, sort of. The shop-vac doesn’t fit snuggly on the tube so I had to hold my hands around it to create enough of a seal for the suction to work and if the string hit even the smallest snag it wouldn’t pull into the tube. That meant I would be on one end with my hands cupped around the tube and the shop-vac for a little while but then I’d have to turn it off, go back up to the top and make sure the string hadn’t caught on anything, like a blade of grass; seriously the smallest snag would stop all progress. Back and forth, shop-vac, then feed the string, back and forth. The shop-vac did eventually pull the string all the way through, and it was much faster than my first attempt with the nut and gravity. This time instead of tying the thin string to the hookup wire I tied the string to a stronger piece of rope and tied that rope to the hookup wire. I was also smarter and staggered the ground wire first and then the hot wire farther down so that the size ramped up gradually: string, rope, one hookup wire, two hookup wires. Then it was back to feeding the wire in on one end, then going down pulling on the rope on the other end, back and forth, push and pull.
Then the rope broke. **** **** (Again, I shall leave my reaction to your imagination.)
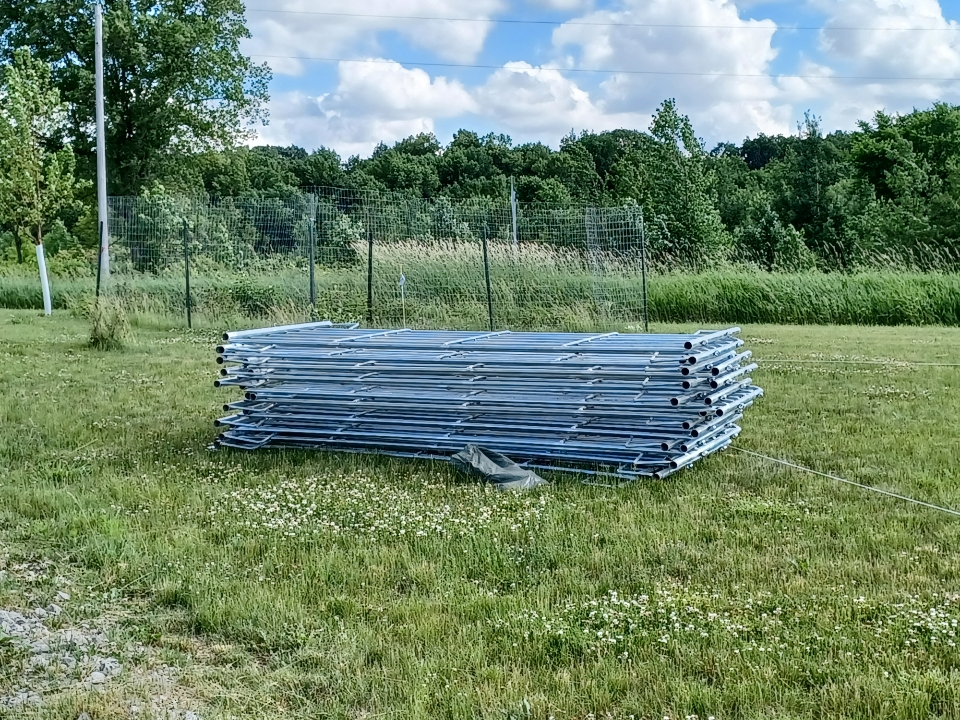
As mentioned in this post, the first time I searched for gates I somehow bought a round pen instead; which then sat in a large pile in our yard. One night after work, when we didn’t think we’d have enough time to work on the primary fence, we thought we could get the round pen up quickly. I know, you think we’d learn.
First we had to decide where it should go. The paper version of the layout and the actual version were close but not exact and I was worried about not having enough room where the water will be (north and west) so we planned on making it as close to the other two sides as possible (south and east). There are a lot of opinions on how narrow the narrowest parts of a paddock track system should be, but I opted for 15 feet of space. Since it was a 60-foot round pen with a radius of 30 feet that meant the center had to be 45 feet from each of the south and east fence lines. That was easier said than done since our corners are not 90 degrees, but we got the center figured out and marked it. From there I measured out 30 feet north, south, east, and west and we started putting up the panels. We had differing opinions on the best process for this. Option one was to move each panel to its designated spot but just set them flat on the ground, then once every panel was positioned we would go back and set them up and connect them. The other option was to set them up as we went, though this still required moving three panels first because one panel alone doesn’t stand up. We went with the second option. The issue is in a 60-foot circle the four cardinal directions are far enough apart that there were still two panels worth of space between the three panels at those points. Or so I calculated; there were twenty panels total, three panels at each of the cardinal directions left eight panels total to fill in between the four spaces between the four cardinal directions, which meant two panels per space. (20 – 3*4 = 8; 8/4 = 2). It did not work out that way. The angles the panels had to meet at was not something I had calculated (I could have, but I didn’t – see previous post about not being that smart after a full day at work) so we were guessing and by the time we were getting to the point where we should be closing our circle we were clearly off; by one and a half panels worth, plus the door. I had forgotten about the door panel when I was calculating – oops. We managed to shift around enough panels so that we got the door panel and that last half a panel in and were only off by one full panel; but at that point we were no longer a round pen, more like an oblong pen. But it was late and we were crabby, so we stopped. As soon as we officially declared we were done Nate saw me staring thoughtfully at the oblong pen and then the space where the water trough will be and said, “You want to move it, don’t you?”
Yes, yes I did.
Staring at a not particularly round, round pen was almost as aggravating as staring at unevenly spaced fence lines. I can’t do anything about the fence lines, or rather I could but the amount of work makes me want to cry, so it was determined that we would even out and move the round pen when we had our friend over to help us with the gate.
This also meant I had more time to think about how to do this right and came up with a much better process. One that I probably could have found online had I bothered to look.
The better way to put up a round pen
Mark out the center. We did that part right at least, and now I had a better idea of where to put it in relation to everything else. We moved it about six feet west and about three feet south.
Actually calculate out the size of your round pen in terms of the number of panels you have. Turns out the twenty 10-foot panels + 5-foot door panel is bigger than the circumference of a 60-foot round pen, by about a full panel! We opted to keep it closer to 60 feet and we just have the extra panel in storage for now. Storage currently being sitting on top of a dirt/weed pile we need to deal with.
Get something (string, tape measure, etc.) that is the length of your radius and tie it to whatever is being used to mark the center point.
Use that string or tape measure and measure out the location of each end of each panel as you place them. This makes sure all your angles are correct automatically.
Have three people to do this!
With the extra set of hands and the better process getting the round pen moved and actually round went much faster and easier. And now it’s actually round!
Now back to the fence, time to get electric.
p.s. do you notice the white bucket? Those little hold digging jerks are back!
We still faced the dilemma of no truck and no delivery option for gates; and no place that rents trucks also sells gates. In the end we opted to get these heavy duty bull gates from Fleet Farm, which were on sale at the time, and rent a truck from the Menards just down the road. The first time we went to get the gates they were out of two of the sizes we wanted. We came back home, did another search and discovered they were sold out anywhere we could reasonably drive (being on sale), so we opted to change the sizes for the two smaller gates and try again the next day. They had the new sizes, so we bought the gates in the store, got the little slip that lets you into the “yard” area to pick them up, then drove two miles down the road to Menards, rented the Menards truck, then drove the Menards truck back to Fleet Farm to get the gates. The gate attendant at Fleet Farm gave us some lip about having a Menards truck – dude, if Fleet Farm rented trucks I would have rented a Fleet Farm truck but you don’t, so shut it! When we were in the yard loading our gates, I noticed that the sizes we had originally wanted but were supposedly sold out were sitting right there – of course. I also noticed that I had forgotten to bring any tiedowns this time; we drove VERY slowly home hoping we didn’t lose a gate on the way. They all made it safely and I managed to get the Menards truck back within the 75 minute window so I didn’t get charged the extra $15!
Now we had to figure out how to get the gates on our posts. The normal way to hang a gate is to drill a large hole through your wood fence post and put this giant J bolt through it, but since we have fiberglass fence posts that isn’t an option. The company we bought our fence posts from do sell gate hinge assemblies, but they are $80+ per gate and when you look, there isn’t much too them. I felt there had to be a cheaper option, and we found one! It looked to be about the same thing and it was only $20 per gate. The size wasn’t a perfect fit, but I measured and it looked like they were just a tiny bit bigger so I figured we could make them work.
Once the hinges arrived we went out to install the gates and ran in to our first issue. We had already put all the stuff (the braces and the ElectroBraid) on the end post on the hinge side of the small gate which meant we couldn’t slide the gate hinges onto the post. We considered taking everything off and starting over, but considering we had already tensioned the ElectroBraid five thousand times (okay, nine times) we said, f-it. This is temporary and this gate is mostly going to be used to go in and out to fill and clean water tanks so who cares what side the hinge is on.
As you can see in the picture the cheaper hinge assembly was also more than “just a tiny bit bigger” and was, in fact, too big to use. Of course. After some staring and swearing I realized I could probably combine some of the pieces of the hinge kit we got with some of the extra pieces from the corner posts we wound up not using because I went and bought a round pen the first time I tried to buy gates. Once the barn is built – it will be built! – we’ll use all the corner posts, but I’ll have figured out a better hinge solution by then (hopefully).
Now that we had a temporary working solution for the hinges, we just had to figure out where to put them on the end post itself. This also proved super challenging; if we had the end post fully installed the braces would be in place and we couldn’t get the hinge parts on, but without having the post up how were we supposed to know where to put the hinge parts? Also someone had to hold the gate while the other person figured out where the hinges should go but the end post wasn’t fully installed so someone had to hold that too. The whole thing took us way too long to figure out, but we did eventually get the end post installed with the hinges on. Then we went to get the J bolts off the gate (they come attached sideways for transport so they don’t stick out) and discovered that we couldn’t. They would not budge. At one point we were actually bending the gate itself, not good. That ended our very frustrating evening; we decided to pause and try again in a few days after a trip to LeVahn Brothers.
The gates are designed with one hinge welded to the gate itself and the other bolted in place so it can be adjusted. We were able to get the adjustable part off and bring that and its stuck J bolt to LeVahn Brothers. I walked in and when they asked what I was looking for I handed them my stuck bolt and said I need to get these two things apart. He said, “I can do that for you.” took it to the back and returned shortly with them separated. Which was great, but I still had seven more stuck things at home and four of them were welded to the gates so I couldn’t bring them into the store to have him very kindly un-stick them for us. It was determined we needed a breaker bar and a really large wrench. I brought my new acquisitions home and they worked like a charm, everything came apart with ease. The proper tools are so important!
In the intervening time I also got much smarter (trying to do these things at night after work is never a good idea, no one is at their smartest after a long day of work) and realized that I could lay out the end post on the ground and lay the gate next to it along with all the other parts and line up where we needed things without anyone trying to hold anything, also we didn’t need to get the gate hinges exactly correct while installing the end post, we just needed to have them in-between the other stuff in the vicinity of their final location. We also had a friend come over to help us out. Having a third set of hands, proper tools, and a better plan made a huge difference! With all that the second gate went up much faster and easier than the first.
Now we had gates; not 100% square and level, but good enough! On to the last step of the fence, electrification. At this point I have stopped saying to myself “How hard could this be?” or “What could go wrong?” Everything about this has been harder than it should have been, and at this step what can go wrong is electrocution, let’s not tempt fate.


