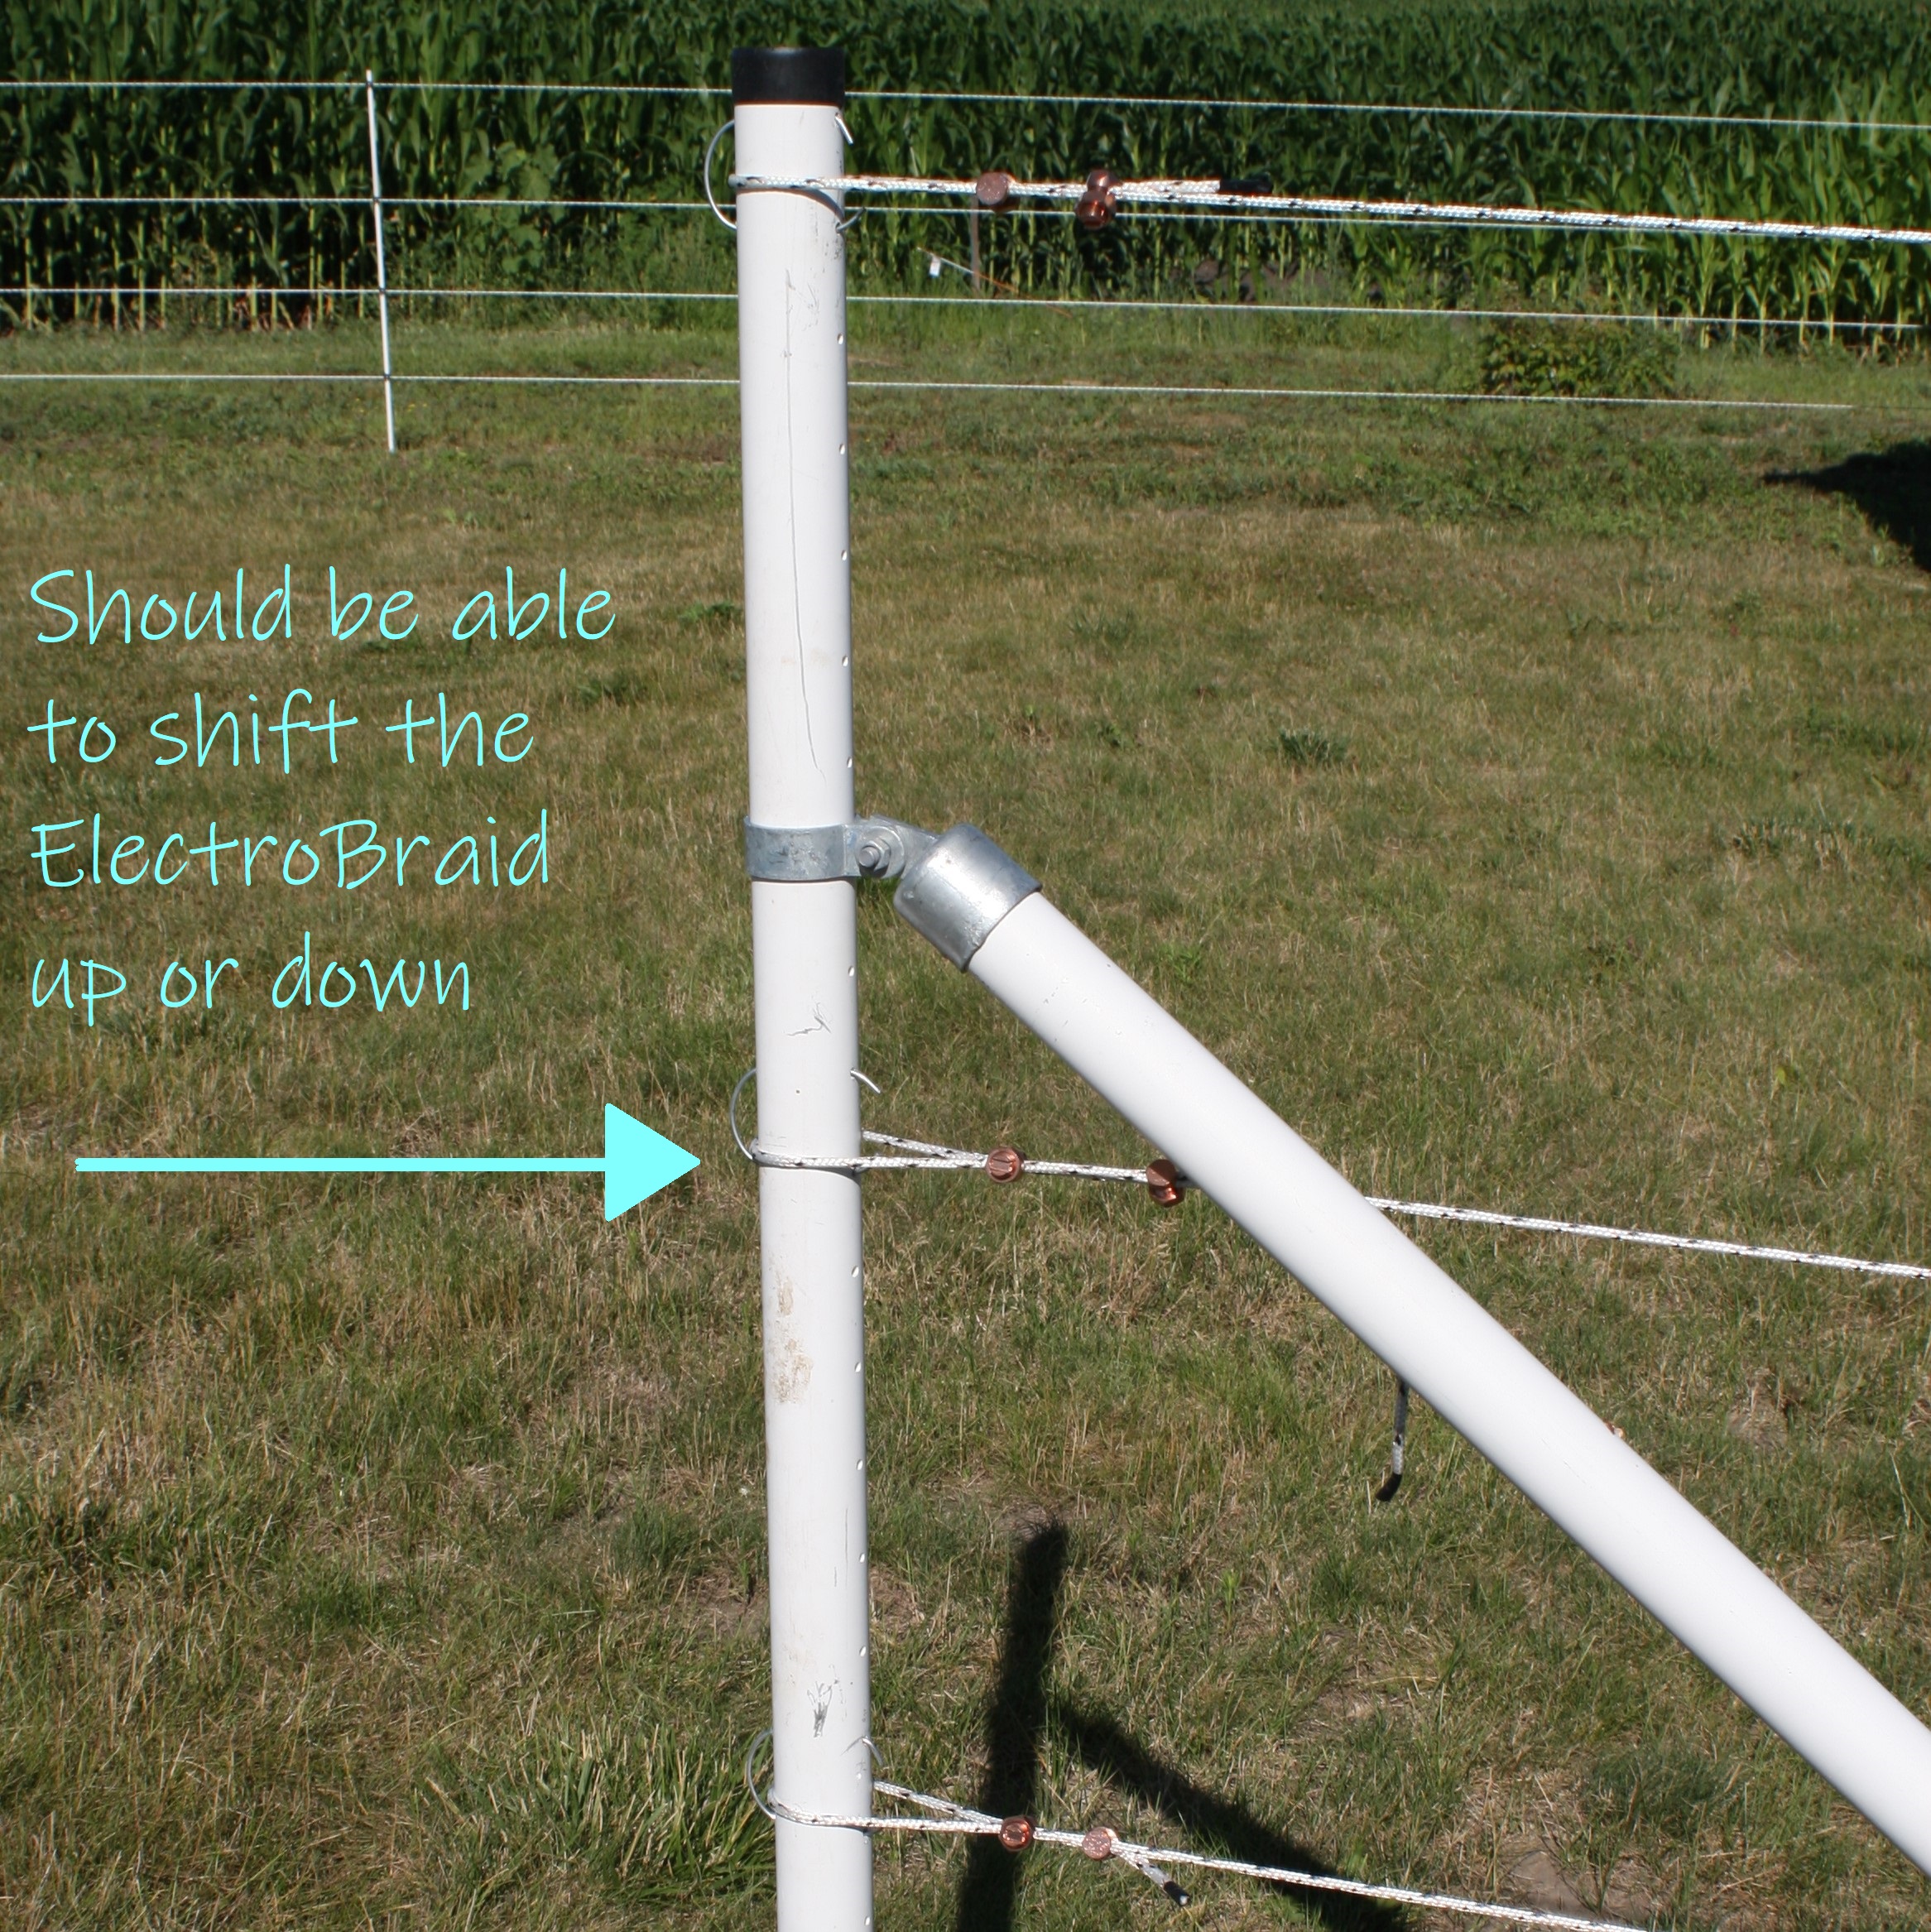
Step Two – Install the First Line of ElectroBraid
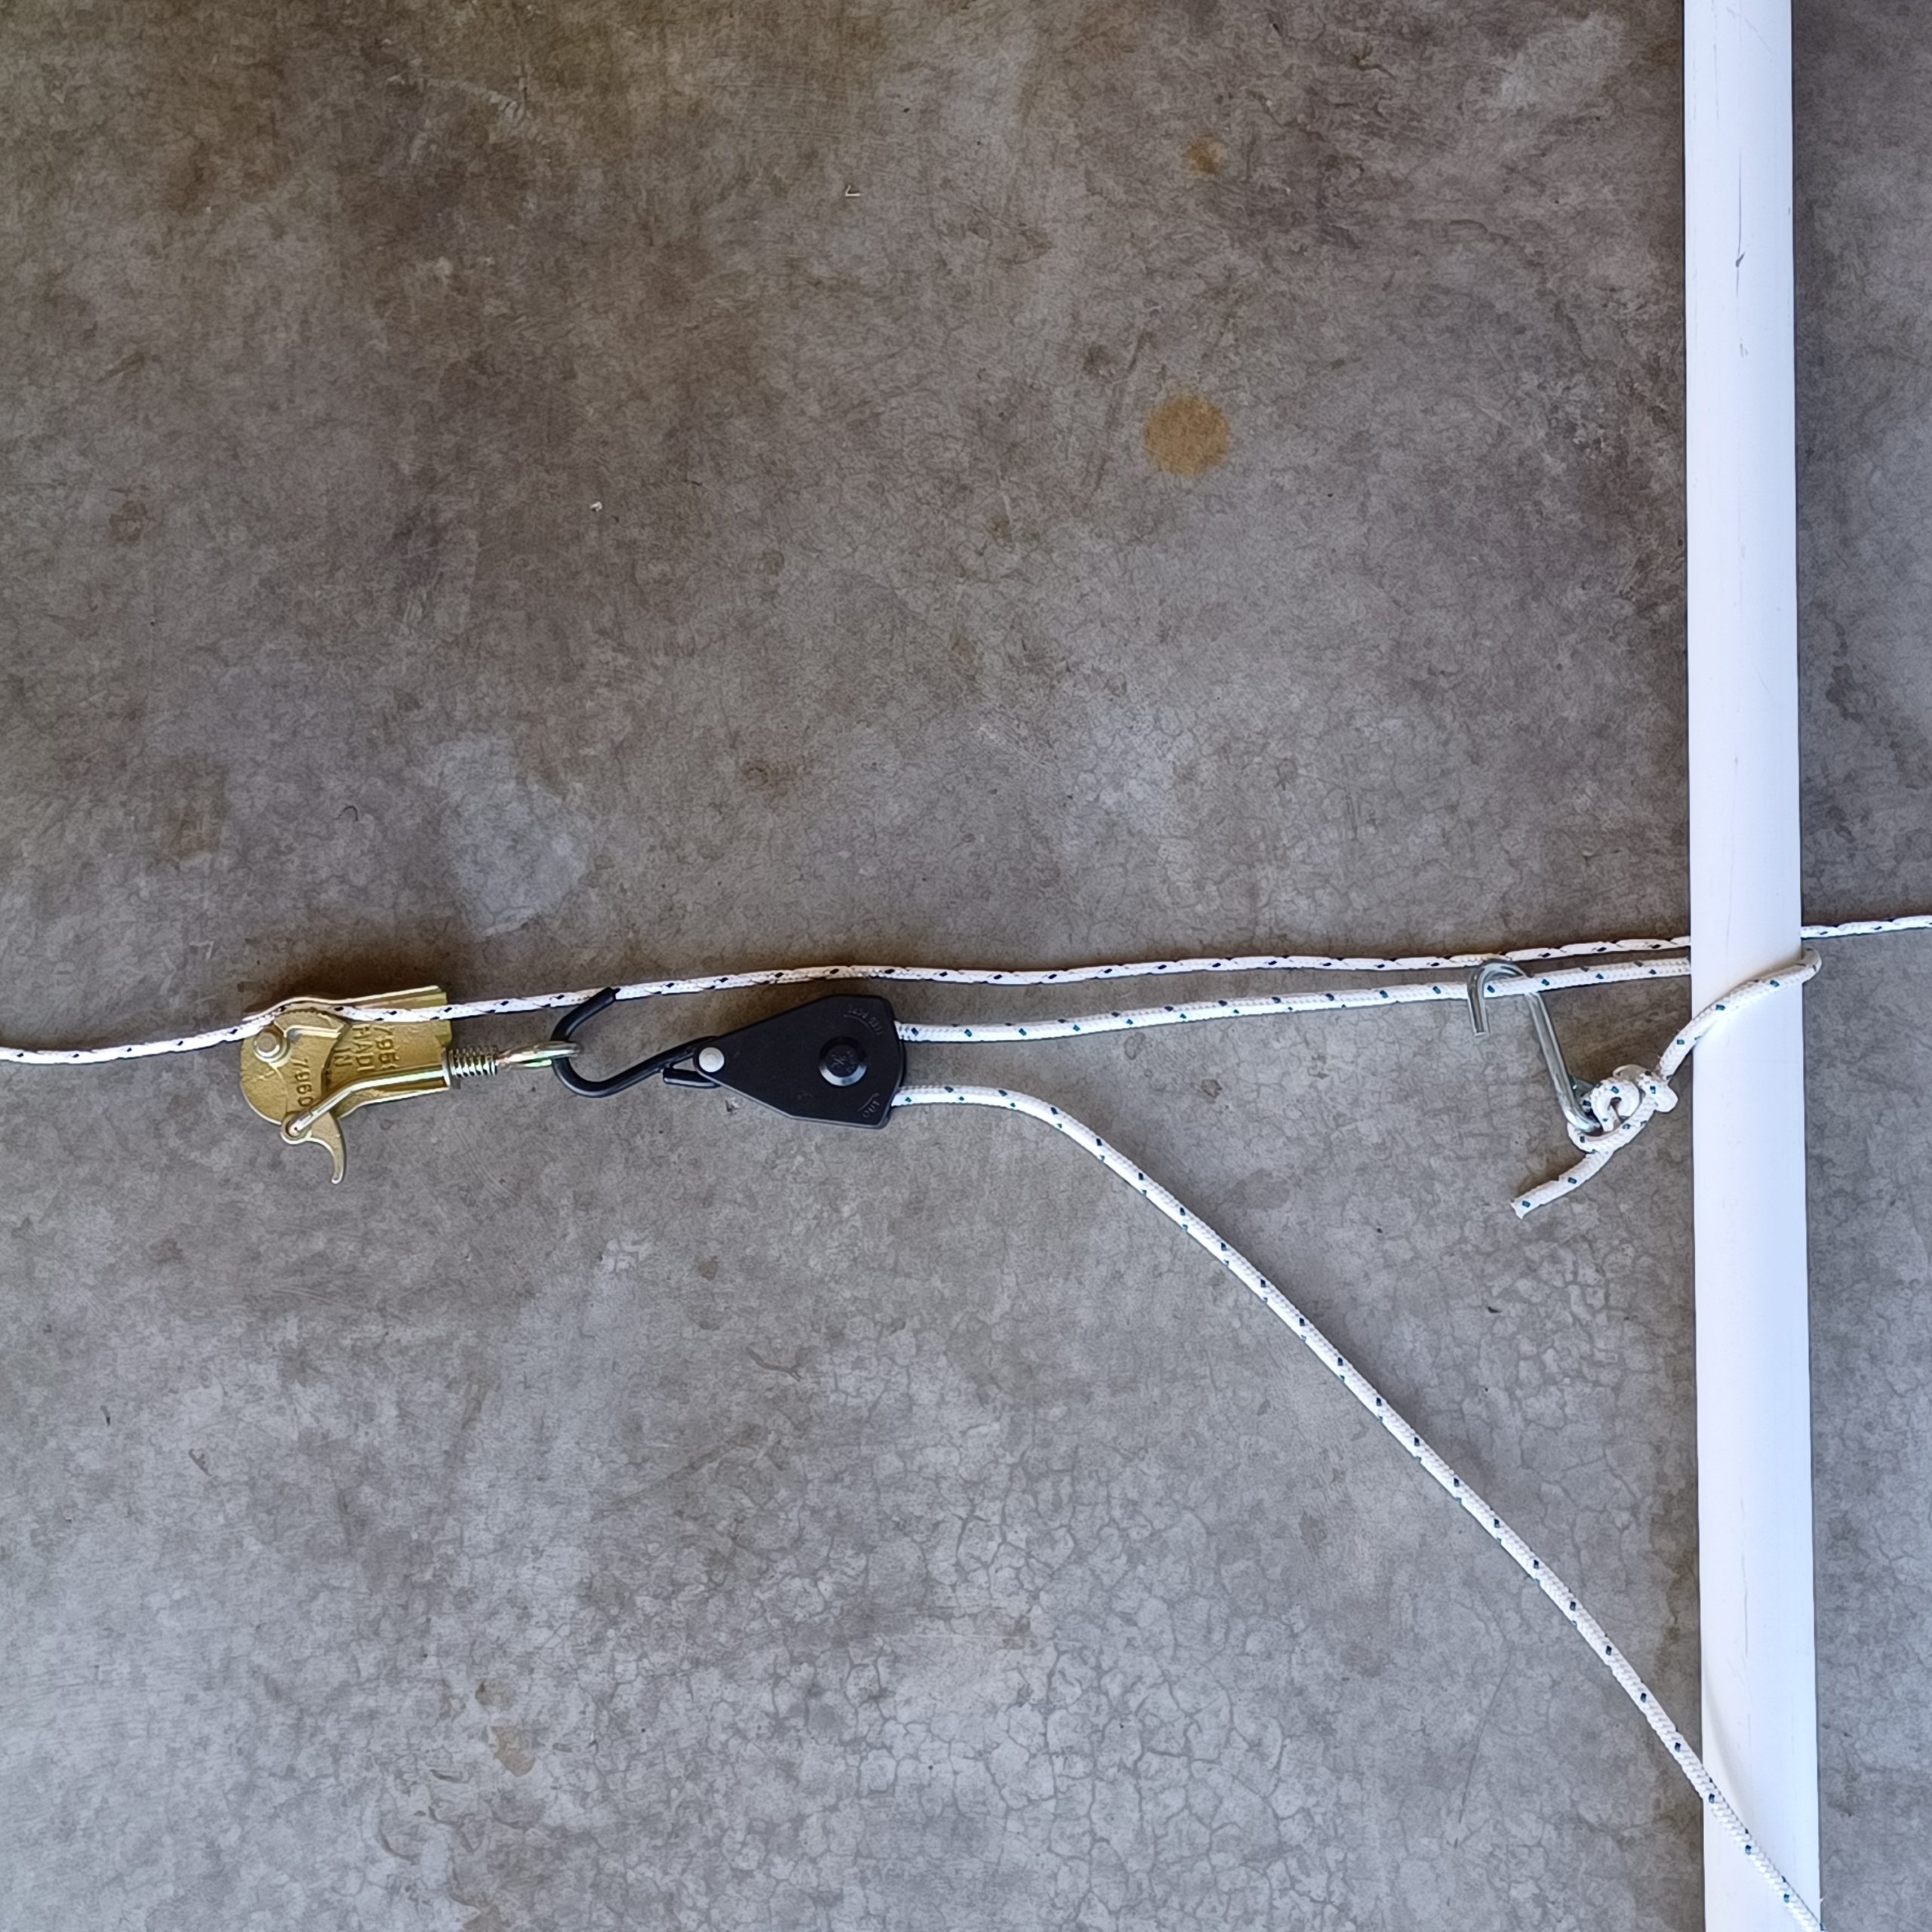
Run one line of ElectroBraid through all the corners and then use that to locate the inline posts so they are actually in-line and you don’t look like you put the fence up while drunk. This is a legitimate concern; I had put up some marker posts for the farmer so he would know where not to plant this year and despite several attempts I could never get them even remotely straight. This way worked much better! To be extra sure we had them straight we decided to run both the top line and the bottom line and to tension both lines. Particularly because on our two very long runs we couldn’t get the bottom line up and off the ground even with all our by-hand pulling. I ran the top line of ElectroBraid through all the corner insulators and connected it to one of the gate posts with one split-bolt connector as directed. Then I went to the corner before the first long run, put on the tensioner kit which was much harder than the video showed, pulled it, and managed to snap something; luckily not in my body! I went to look, and my single split-bolt connector was no where to be seen. Try, try again. I put the ElectroBraid back on; I used two split-bolt connectors this time and I tightened the ever living daylights out of them. I went back to the corner, reset the tensioner, pulled, and it worked! On to the next corner. Because we have such long runs we had to use two tensioners. You put a tensioner on one corner and pull out as much of the slack as you can (which is what the video tells you to do), then put the second tensioner on another corner, again pull out as much slack as you can, then go back and get the first tensioner off that first corner and move it down to the next corner, repeat until you’ve gotten all the slack out of the line. The problem was we couldn’t get the tensioners to release. There is this little release tab that is supposed to let go and of course it wouldn’t. Most of the time I would just wiggle the hook part on the other end enough to get it to slip off but a few times we had to use the butt of a kitchen knife to push the tab to release it but each time we did that it felt like it was going to snap off. And then it did. Of course. The next day we purchased another tensioner, and I had the genius idea of using a quick release knot (the kind you use to tie a horse so you can release it quickly in an emergency even if it is under a lot of pressure) on the other end of the tensioner so we could use that to get it off. That worked much better; most of the time.
Side note – this is a good reminder that the basic quick release knot isn’t actually the best one to use because sometimes if things pull just right it won’t release. I really need to re-learn the better version to use with horses. Back to our tale of mishap.
I also realized that the metal clamp part of the tensioner system goes on much easier if the plastic ratchet part isn’t already hanging on the one end. I have no idea why this makes a difference, but it did. Now we had the top and bottom lines up and tensioned. If you touched it you could feel it vibrate from the tension and if our hat brims touched the fence line you could hear it hum.
Step 3 – Install the Inline Posts
We had gotten what we thought was a rod to use to put in pilot holes in the ground for the inline posts. It was three feet long, metal, pointed on one end with a handle on the other. We would get that positioned, Nate would mallet it in, then we’d pull it out and put in the 8-foot inline post and then pound that in. On the very first try Nate managed to break our new mallet. Of course. This is why buying the absolute cheapest option doesn’t always save you money. Luckily I had also bought a more expensive mallet and hadn’t returned it yet so the more expensive one it was! We got through about half the posts before our metal pilot hole thing hit a rock and went from being a T to a J. Of course. Another run to the store – except they didn’t have any more. So I started looking online to see if I could find one and it turns out they are not pilot hole tester things, they are their own grounding rods to use with temporary systems. Oops. So now what? Driving 8-foot-tall posts into the ground straight was close to impossible before, how are we going to do it now? Bluebird fencing mentioned that some clients have used a giant drill bit to drill a pilot hole into the ground to get them started so I went searching for that. Best I could find was 18” long. Not ideal, but better than nothing. This is also when I re-discovered my complete inability to drill straight. You could offer me $1,000,000,000 and all I had to do was drill one hole straight in the ground and I could not do it. The first one I tried I think I drilled 20 holes trying to get it in straight; truly ridiculous. I did eventually get better. The trick was to keep drilling into the same spot, somehow all my mistakes slowly fixed each other until I was close enough to straight. You would also think that if every time I was too far up and to the right I could correct for that but no; I was almost always too far up and to the right, except for the two times I was too far down and to the left. Regardless I got them in and straight enough to be acceptable.
Step 4 – Install the Insulators on the Inline Posts
We used quick clip insulators for the inline posts. You slip them on the post, twist them to get the ElectroBraid in, and then screw them in place with a tiny screw in the back. One thing we actually did right was to measure out where all the insulators were on the corner posts and then pre-marked all the inline posts in the garage before installing them. The top and bottom lines were already up and tensioned so getting them into the insulators was much harder than the directions indicated. Nate did discover the hack of putting the insulator on the top line of ElectroBraid first, and then putting the insulator on the inline post, which was much easier, but that wasn’t an option for the bottom line.
Step 5 – Install the Remaining Lines of ElectroBraid
We were in the middle of putting up the middle two lines of ElectroBraid when this happened:
That top line is NOT supposed to cut across like that. No big deal I thought, that was the corner post where I had heard the crack so I had probably cracked that corner insulator and that is why it broke. We released the tension, put on a new corner insulator, and re-tensioned that line and then continued on. The two middle lines went better. Putting them through the insulators before tensioning it made it go much faster and we got better at positioning the quick-release knots of the tensioners so that they would, in-fact, quick-release.
With that we had the wire up and run for about 2/3 of our fence line. YAY!!!
I then started counting out the insulators for the rest of the fence so I could pre-screw the bolts in and realized that we were short. That can’t be right! I counted everything when we went through the corner post debacle. It was at this point that I realized you aren’t supposed to use the CORNER rolling insulators on an END post. You are just supposed to loop the ElectroBraid around the end post. Of course. The distance to travel around the outside of the post is just a bit longer than going through the insulator and the bottom line was already so tight there wasn’t any slack to work with so I had to go and loosen it at the other end and discovered that we had over tightened the split-bolt connectors and the ElectroBraid was starting to fray. Of course. So now we have to loosen all the connections just a little bit. Back to the bottom line – we had to put everything into tightening it to get it around the end post but we did it! And then another insulator snapped and there went that bottom line. Of course. We loosened the other end a little more and tried again and then it stayed.
Until two days later when not one, not two, but three of the lines broke their corner insulators.


